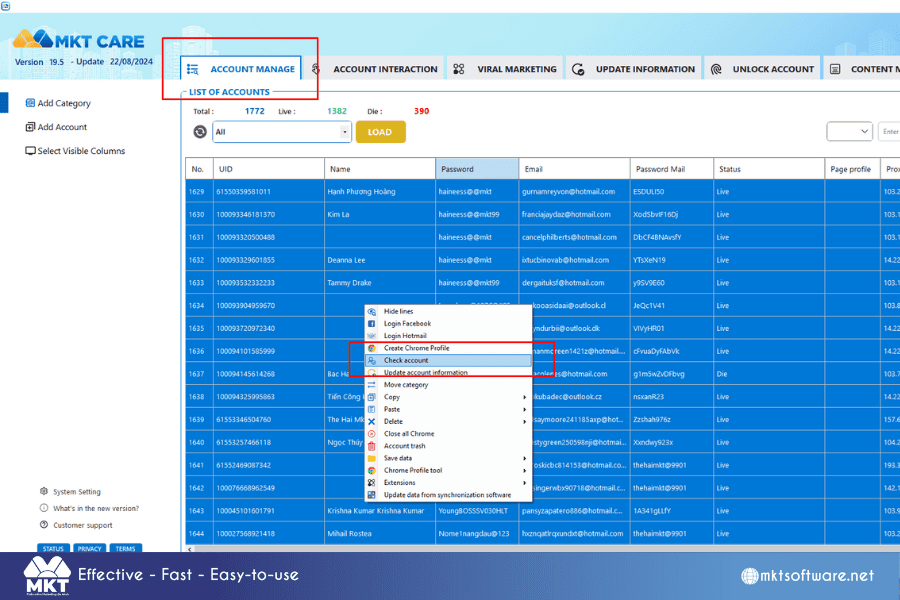
Managing multiple Facebook accounts can be a challenging task, especially when it comes to ensuring that all accounts are active and functioning correctly. For marketers, managing live and healthy accounts is critical to maintaining successful ad campaigns, outreach efforts, and overall social media presence. In this guide, we will show you how to easily check live/die status of Facebook accounts using MKT Care software.
Table of Contents
Toggle
Step 1: Install and Set Up MKT Care
If you haven’t already installed MKT Care, visit the official website to download and install the software. Once installed, log in with your credentials and set up the software according to your Facebook account management needs.
Step 2: Add Your Facebook Accounts to MKT Care
To begin checking the live/die status, you need to add your Facebook accounts into MKT Care
Watch how to add Facebook accounts
Step 3: Navigate to the Live/Die Checking Feature
Once the accounts are added, navigate to the section of MKT Care that checks account health:
- Look for the “Live/Die Check” feature under the Account Management tab.
- Select the accounts you wish to check from your list.
Step 4: Initiate the Live/Die Check
Now that you have selected the accounts to be checked, click on the Check Status button. MKT Care will begin scanning the selected profiles, evaluating whether they are active (live) or inactive (die).


